Call or Text us: (929) 605-4397

Category: Buying Guides

  • Custom Foam Insert Layout Files: Tool Photos, Tracings, CAD and Logos

    Custom Foam Insert Layout Files: Tool Photos, Tracings, CAD and Logos

    Published November 2, 2026. Last updated November 2, 2026.

    Custom foam inserts are only as accurate as the files behind them. Customized Foam Inserts needs your case model, a complete item list and a clean outline for every tool, from an overhead photo with a scale reference, a paper tracing or a CAD file, plus any logo or label text. Send those and a free mockup comes back within 24 hours.
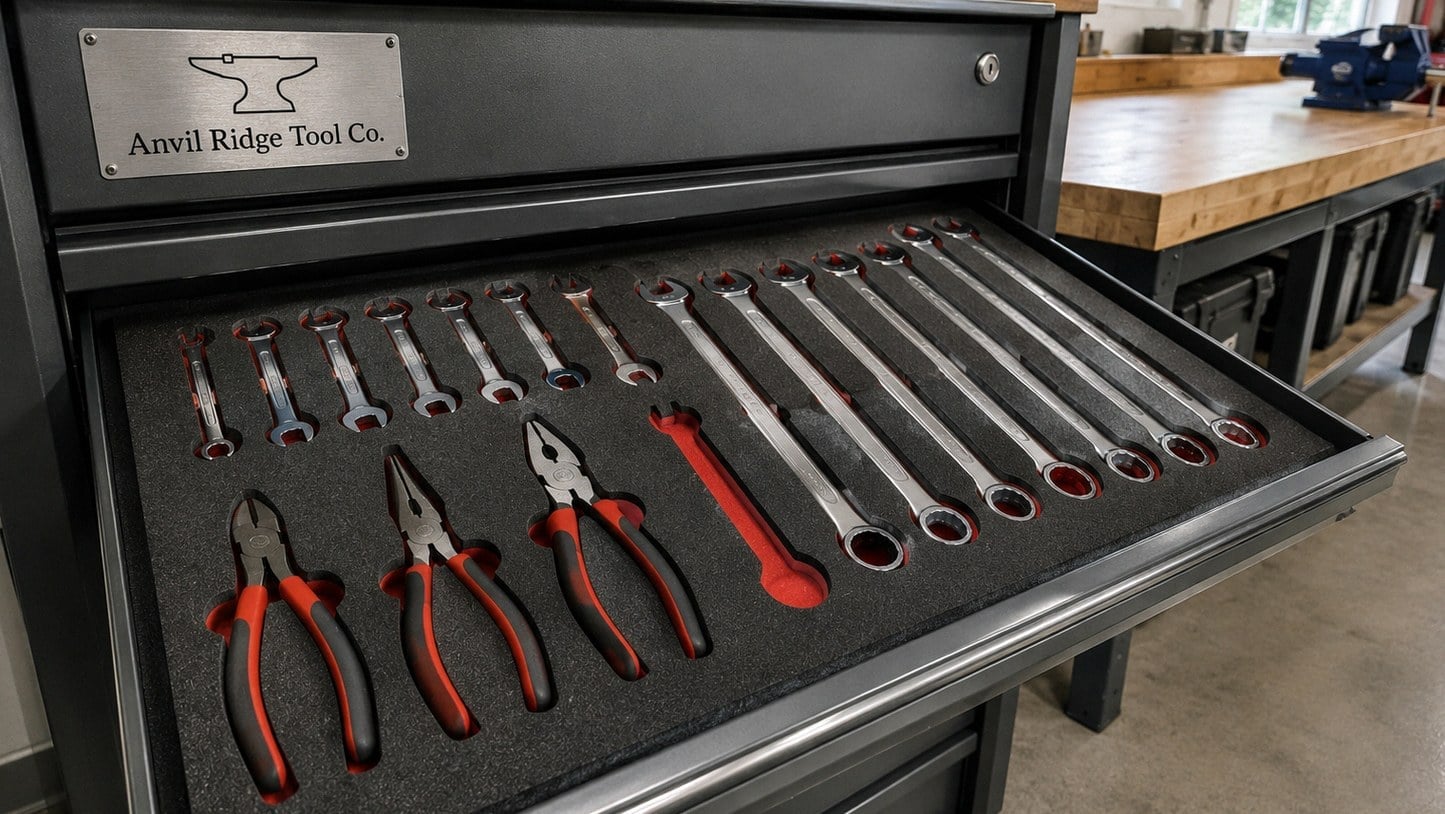
    Custom Foam Insert Layout Files: Tool Photos, Tracings, CAD and Logos - custom printed foam inserts from Customized Foam Inserts
    Custom foam inserts with a logo, produced by Customized Foam Inserts.
    Key facts
    • Overhead photos with a ruler or printer paper for scale give accurate pocket outlines.
    • CAD or DXF files are the most precise outline source for products and parts.
    • Vector logo files give the cleanest etched edge in foam.
    • Free mockup within 24 hours, with unlimited free revisions.
    • Minimum order of 12 foam inserts, with standard turnaround of about 2 weeks.

    What files does Customized Foam Inserts need to lay out a custom foam insert?

    Customized Foam Inserts needs three things to lay out a custom foam insert: the case or drawer model, a list of every item that goes inside, and a clear outline source for each item. The outline source can be a flat overhead photo, a tracing on paper, or a CAD or DXF file from the tool or product maker. With those in hand, the team builds a layout and returns a free mockup within 24 hours.

    Think of the layout file as artwork for foam. A printed product needs a logo file; a foam insert needs the shapes of your tools, the order you want them in and any labels or logos you want etched into the surface. The better those inputs are, the fewer revision rounds you need before cutting.

    A complete layout package usually includes:

    • The case brand and model, or the drawer make and size class, so the outer shape and depth are right.
    • An item list with names, written the way your team refers to each tool.
    • Outline sources: overhead photos, tracings or CAD files for every item.
    • Notes on grouping, finger pulls and any item that must sit on top.
    • Label text, part numbers or a logo file if you want etching.

    How do you photograph tools so they can be traced into foam insert pockets?

    Photograph tools for a foam insert from directly overhead, on a plain contrasting background, with a ruler or a sheet of printer paper in the frame for scale. A straight-down shot keeps outlines true, the contrast lets the edge read cleanly, and the reference object lets the layout team size each pocket correctly against the case.

    Angled photos are the most common reason a pocket comes back too tight or too loose. When a phone tilts, the near end of a wrench looks wider than the far end, and that distortion carries straight into the cut outline. Stand over the table, hold the phone level and fill most of the frame with the tool.

    Good tool photos for foam insert tracing follow a short routine:

    1. Lay a white sheet for dark tools or a dark sheet for bright or chrome tools.
    2. Place the tool flat, in the orientation you want it to sit in the case.
    3. Add a ruler or a full sheet of printer paper next to it for scale.
    4. Shoot from directly above with even light and no hard shadows.
    5. Take a side shot too if the tool has a raised handle, a trigger or a dial.

    Side shots matter because a foam insert pocket has depth as well as outline. A drill with a battery pack, a torque wrench with a raised scale or a meter with a probe holder all need stepped pockets, and the side view shows where the step goes.
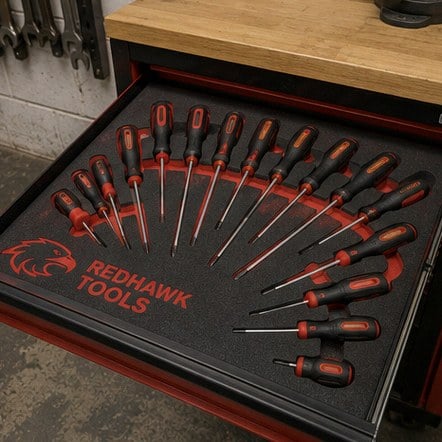
     - one of the custom foam inserts styles from Customized Foam Inserts
    Custom foam inserts from Customized Foam Inserts.

    Can I send CAD or DXF files instead of photos for a custom foam insert?

    Yes, CAD and DXF files are the most accurate outline source for a custom foam insert, and Customized Foam Inserts can work from them directly. Product designers, engineering teams and manufacturers packing their own parts often already have a drawing, and an outline exported from that drawing removes any guesswork about edges and curves.

    When you send CAD files, export the outer profile of each part as seen from the angle it will rest in the foam. A full assembly with internal features is harder to read than a simple outline. If a part will lie on its side in the case, export that side view rather than the top view used for machining.

    Mixed packages work well too. Many orders combine a DXF for a custom product with overhead photos of off-the-shelf tools such as chargers, cables and hand tools that have no drawing. Tell the team which file belongs to which item so nothing is matched to the wrong pocket.

    Outline sourceBest forWatch out for
    Overhead photo with scale referenceHand tools, meters, everyday gearTilted camera angles and dark shadows
    Paper tracingFlat tools and simple shapesPencil drift around handles and tips
    CAD or DXF fileProducts, prototypes, machined partsExporting the wrong face of the part
    Physical sampleOdd shapes with no drawingPlanning shipping time into the schedule

    How should you mark up a layout sketch before requesting a quote?

    Mark up a foam insert layout sketch by showing where each item should sit, which items belong together and where hands need room to grab. A rough drawing on a printout of the case outline is enough. The layout team turns that sketch into a clean, cut-ready mockup, so neatness matters far less than clear intent.

    Start with workflow. Put the items used first or most often toward the front edge of the case or drawer, and keep sets such as sockets, bits or lenses in a single row so a gap is obvious. Heavy items usually belong near the hinge side of a hard case so the lid closes evenly and the weight stays balanced when carried.

    Useful notes to add to a sketch for a custom foam insert:

    • Arrows showing which way each tool faces, especially handles and triggers.
    • Circles where you want finger pulls for lifting items out.
    • Any item that must sit in a top tray or in the lid foam.
    • Spots where you want a spare empty pocket for future tools.
    • Label text written right beside the pocket it belongs to.

    If your case has a lid, sketch the lid as well. Lid foam can hold flat items such as manuals, gauges and charts, and the hard case foam insert page shows how lid and base layouts work together.

    How do logos, labels and foam colors fit into a foam insert layout file?

    Logos, labels and foam colors are part of the foam insert artwork, so include them in the same package as your tool outlines. Customized Foam Inserts can etch a company logo, tool names, part numbers or kit IDs into the foam surface, and a two-tone build places a contrasting color under the top layer so every empty pocket stands out.

    For logos, a vector file such as AI, EPS, SVG or a vector PDF gives the cleanest etched edge. A high-resolution PNG can work for simple marks. Fine detail and thin lines read less clearly in foam than on paper, so a bold version of your logo usually etches best. The engraved custom foam inserts page covers etched logos and labels in more detail.

    Label text should be short and consistent. Use the names your technicians already say out loud, keep abbreviations the same across every case, and decide whether part numbers or plain names help your team more. If several cases share a layout but belong to different crews, the label can carry a kit ID while the tool pockets stay identical.

    For color, pick the top layer for how the case looks and the base layer for contrast. A dark top over a bright base is the classic tool control combination, while single-color foam suits presentation and packaging work.

    What artwork mistakes slow down a custom foam insert order?

    The artwork mistakes that slow down a custom foam insert order are missing items, distorted photos and unclear case details. Each one forces an extra revision round. None of them is hard to avoid, and a few minutes of checking before you send files usually saves a day or more of back-and-forth after the mockup arrives.

    • An incomplete item list. A charger, a spare battery or a small hex key left off the list means the layout has to be rebalanced once you notice it.
    • Photos without scale. Without a ruler or paper reference, every pocket has to be estimated, and estimates drift.
    • Tools photographed in holsters or boots. If a tool lives in a rubber boot or sleeve, photograph it that way; if not, remove the accessory first.
    • An unnamed case model. Cases that look alike can have different corner radii and depths, so name the exact brand and model.
    • Low-resolution logos. A tiny web image etches with soft, broken edges.

    Customized Foam Inserts offers unlimited free revisions on the mockup, so nothing is wasted if something is missed. Getting the inputs right the first time simply moves your order into production sooner, with standard turnaround of about 2 weeks after approval.

    How does mockup approval work once your files are in?

    Once your files are in, Customized Foam Inserts builds a layout and sends a free mockup within 24 hours. The mockup shows every pocket, finger pull, label and color choice on the outline of your case or drawer. You review it, request changes as many times as you need, and pay nothing until you approve the design.

    Review the mockup with the person who actually uses the tools, not only the person placing the order. That user will spot a wrench facing the wrong way, a pocket that blocks a latch or a set arranged in an unfamiliar order. Check each item on the mockup against your original list, then confirm label spelling and logo placement.

    After approval, the insert moves to cutting. Orders start at a minimum of 12 foam inserts, which suits a fleet of matching cases, a run of product packaging or a set of drawers across several chests. Your approved layout stays on file, so later reorders match the first batch without repeating the artwork work. The how it works page walks through each step from files to delivery, and the tool drawer foam organizer page shows finished drawer builds.

    Frequently asked questions

    Can I trace my tools on paper instead of taking photos for a foam insert?

    Yes, paper tracings work well for custom foam inserts when tools are flat and simple. Hold the pencil straight up and down so the line follows the true edge rather than drifting outward, and write the tool name inside each outline. Scan or photograph the sheet from directly above. Customized Foam Inserts uses the tracing as the outline source and checks it against the case before building the mockup.

    What background color should I use when photographing tools for foam pockets?

    For foam insert pocket tracing, choose a background that contrasts strongly with the tool. Dark tools such as black wrenches and meters read best on white paper, while chrome or bright tools read best on a dark sheet or mat. A clean edge between tool and background lets the layout team draw an accurate outline quickly, with fewer revision rounds before the mockup is approved.

    Do I need to send a photo of the inside of my case for a foam insert?

    A photo of the empty case helps a foam insert layout, though the brand and model name matter most. The photo shows hinges, latches, molded ribs and any lid features that affect where pockets can go. Customized Foam Inserts uses the model to size the outer shape and depth, and the photo to avoid placing a tool where a hinge or rib would press into it.

    How should I show a tool that has a raised handle or trigger in my foam insert files?

    For a foam insert, send an overhead photo plus a side photo of any tool with a raised handle, trigger, dial or battery pack. The side view shows where the tool is thickest, so the pocket can be cut with a deeper step in the right place. Without it, a pocket may hold the body snugly but leave the raised part pressing against the lid foam.

    Can one set of foam insert files cover several identical cases?

    Yes, one set of foam insert files can cover every identical case in an order. Customized Foam Inserts builds a single layout, you approve the mockup once, and every insert in the run is cut from that approved design. If different crews need their own kit IDs or names etched in, the pockets can stay identical while only the label text changes from case to case.

    What file format works best for product outlines in packaging foam inserts?

    For packaging foam inserts, a DXF or other CAD export of the product outline is the most accurate format. Export the face of the product as it will rest in the box, not the machining view, and include accessories such as cables or adapters as separate outlines. Customized Foam Inserts can mix CAD outlines with photos for items that have no drawing.

    Should I include future tools when I send files for a foam insert?

    Include future tools in your foam insert files if you already know their shape, or mark a spare pocket on your sketch if you do not. A reserved pocket keeps the layout balanced and avoids a full redesign later. Customized Foam Inserts can show the spare space on the mockup so you can see how it fits beside the tools you carry today.

    How do I send foam insert files when a tool has no drawing and is hard to photograph?

    When a tool is irregular and hard to photograph, a physical sample is the most reliable outline source for a foam insert. Customized Foam Inserts can discuss sending the item so the shape is captured directly. Plan the shipping time into your schedule, and send everything else as photos or files in the meantime so the rest of the layout can move forward.

    Can I reuse my approved foam insert layout for a different case model?

    An approved foam insert layout can often be adapted to a different case model, but the pockets usually need rearranging because the outer shape and depth change. Customized Foam Inserts starts from your saved tool outlines, fits them to the new case and sends a fresh mockup. Reusing outlines saves time because the tools themselves do not need to be photographed again.

    Who on my team should review the foam insert mockup before approval?

    The person who uses the tools every day should review the foam insert mockup alongside the person ordering. Daily users notice when a tool faces the wrong way, when a set is out of order or when a pocket blocks a latch. Customized Foam Inserts offers unlimited free revisions, so gathering feedback from users before approval costs nothing extra.

    How do I label which file belongs to which pocket in a foam insert order?

    Name each foam insert file after the item it shows, using the same names as your item list, such as torque wrench or meter probes. Matching names prevent an outline from being placed in the wrong pocket. A short spreadsheet or numbered list linking each file to its item helps on larger kits with many similar tools, sockets or bits.

    Get a free mockup for your foam inserts

    Send your logo or idea and the quantity you have in mind. Customized Foam Inserts returns a free mockup within 24 hours, you approve the design before anything is produced, and standard turnaround is about two weeks with faster options available. Get a custom quote.
  • Custom Foam Inserts for Aviation Maintenance: A Tool Control Playbook

    Custom Foam Inserts for Aviation Maintenance: A Tool Control Playbook

    Published October 26, 2026. Last updated October 26, 2026.

    Custom foam inserts give aviation maintenance teams a visual tool control system: every tool sits in its own cut pocket, so a missing item shows before a panel is closed or a technician leaves the aircraft. Customized Foam Inserts cuts drawer inserts, line kit cases and shadow boards from your tool list, with a free mockup within 24 hours.

    Custom Foam Inserts for Aviation Maintenance: A Tool Control Playbook - custom printed foam inserts from Customized Foam Inserts
    Custom foam inserts with a logo, produced by Customized Foam Inserts.
    Key facts
    • Every tool gets its own cut pocket, so a missing item shows at a glance.
    • Two-tone foam makes empty pockets stand out under hangar lighting.
    • Etched labels can carry tool numbers, kit IDs or technician names.
    • Free mockup within 24 hours, with unlimited free revisions.
    • Orders start at 12 foam inserts, with standard turnaround of about 2 weeks.

    Why do aviation maintenance teams use custom foam inserts for tool control?

    Aviation maintenance teams use custom foam inserts because a cut pocket for every tool turns tool control into a glance. When a technician closes a panel or signs off a task, an empty pocket shows at once that a wrench, driver or inspection mirror is still somewhere on the aircraft, in an intake or behind an access door.

    Loose tools in a drawer or a soft bag cannot do that. A missing item blends in with everything else, and finding the gap means counting against a list. A foam insert cut to the exact outline of each tool makes the inventory visual, so the check takes seconds and does not depend on memory at the end of a long shift.

    Customized Foam Inserts cuts each insert from your own tool list and case or drawer model, so the layout matches what your technicians actually carry rather than a generic kit. Common builds for hangar work include:

    • Rolling tool chest drawers organized by task or by tool type.
    • Hard cases for line maintenance kits that travel to the ramp or a remote stand.
    • Shadow boards for shared crib tools and specialty fixtures.
    • Lid inserts for flat items such as feeler gauges and torque charts.

    How should a hangar lay out foam inserts for tool chest drawers?

    A hangar should lay out tool chest foam inserts so that each drawer serves a clear purpose and every pocket has visible space around it. The best layouts group tools by how they are used on the job, keep frequently used items toward the front of the drawer, and leave a finger pull beside each tool so gloved hands can lift it out cleanly.

    Start with an honest list of what lives in each drawer today, then remove anything that belongs elsewhere. Drawer depth matters: shallow drawers suit a single layer with sockets, wrenches and pliers laid flat, while deeper drawers can hold ratchets, torque wrenches and inspection lights with stepped pockets.

    A practical drawer plan for an aviation tool chest often looks like this:

    1. Top drawers: screwdrivers, picks, mirrors and small inspection tools used on nearly every task.
    2. Middle drawers: sockets, extensions and ratchets grouped by drive size.
    3. Lower drawers: pliers, safety wire tools, cutters and larger wrenches.
    4. Bottom drawer: torque wrenches and bulky items in deeper pockets.

    The tool drawer foam organizer page shows the drawer builds Customized Foam Inserts produces, and the free mockup lets your lead technician confirm the arrangement before anything is cut.

     - one of the custom foam inserts styles from Customized Foam Inserts
    Custom foam inserts from Customized Foam Inserts.

    Should aviation foam inserts be two-tone or single-color?

    Most aviation tool control programs choose two-tone foam inserts, because a contrasting bottom layer makes an empty pocket stand out sharply under hangar lighting. A bright base under a dark top layer means a missing tool shows as a bold patch of color that a supervisor can spot from across the bay.

    Single-color foam inserts still work well when the case is used for shipping parts, holding test equipment, or storing items that are checked by a separate process. The outline of each pocket still marks where an item belongs, and a single color can suit cases that sit in a stores area rather than on a tool chest.

    The decision usually comes down to how the insert will be inspected:

    Use in the hangarUsual choiceReason
    Technician tool chest drawersTwo-toneEmpty pockets are obvious at shift change
    Line maintenance kitsTwo-toneFast visual check before leaving the aircraft
    Test equipment casesSingle-color or two-toneFewer items, often logged separately
    Parts shipping casesSingle-colorProtection matters more than visual inventory

    For a full side-by-side, see two-tone vs single-color foam inserts.

    Can foam inserts carry tool numbers, crib IDs or technician names?

    Foam inserts can carry etched labels beside each pocket, which aviation teams use for tool numbers, crib identifiers, kit names or the name of the technician who owns the chest. Labels turn the insert into a reference that matches your tool control records, so anyone checking a drawer knows exactly what belongs in each space.

    Labeling is especially useful when several tools look alike. Two sockets that differ by one size, or a pair of similar safety wire pliers, are easy to swap by mistake. A label under each pocket removes the guesswork and makes the correct return location obvious.

    Within one order, Customized Foam Inserts can vary the labels from insert to insert while keeping the pocket layout identical. That lets a maintenance organization give every technician the same drawer layout with a different name or chest number on each set, which keeps training simple and still ties each insert to one person or one station.

    Send your naming convention with your tool list, and the mockup will show each label in place for review.

    How do line maintenance kits differ from hangar tool chests?

    Line maintenance kits differ from hangar tool chests because they travel. A kit carried to the ramp, a remote gate or another station needs a hard case with a foam insert that holds every tool firmly, survives being carried and loaded into vehicles, and can be checked quickly before a technician walks away from the aircraft.

    That changes the design priorities. Pockets should hold tools snugly so nothing shifts in transit, and the most important items should be visible as soon as the lid opens. A lid insert can secure flat items and keep everything pressed in place when the case is carried on its side.

    Good line kit foam inserts usually share these traits:

    • A fixed, minimal tool list built around the tasks the kit supports.
    • Two-tone foam so a missing tool shows before the case is closed.
    • Labels with the kit identifier, so each case can be logged in and out.
    • Room for a flashlight and inspection mirror, which are easy to leave behind.

    Customized Foam Inserts cuts these kits for the hard case your team already uses. See the hard case foam insert and equipment case foam pages for case builds.

    Where do shadow boards fit in an aviation tool control program?

    Shadow boards fit in an aviation tool control program wherever tools are shared rather than assigned to one technician. A tool crib, a specialty fixture wall or a shared bench benefits from a foam shadow board because every item has a marked home that anyone can check, and an empty outline immediately shows what has been signed out.

    Foam shadow boards work well for bulky or awkward items that do not fit in a drawer: rigging fixtures, special adapters, borescope accessories and long extensions. A board mounted near the work area keeps those items visible instead of buried in a cabinet.

    Many organizations pair shadow boards with a sign-out log, so the empty pocket shows that something is out and the log shows who has it. Customized Foam Inserts produces custom shadow boards in the same foam and color options as drawer inserts, so the crib and the tool chests share one visual system. That consistency helps new technicians learn the program faster.

    What do you need to send to get aviation foam inserts quoted?

    To get aviation foam inserts quoted, send the make and model of each tool chest or case, a list of the tools for each drawer or kit, and a note on whether you want two-tone foam and etched labels. With that information Customized Foam Inserts can prepare a free mockup within 24 hours, with unlimited free revisions until the layout is right.

    Photos help. A picture of each drawer with the tools laid out the way your technicians prefer them gives the layout team a strong starting point. Note any tools that are oversized, unusually shaped or still to be purchased, so space can be planned for them.

    Orders start at 12 foam inserts, which suits most hangars once drawers across several chests are counted together. Standard turnaround is about 2 weeks after you approve the mockup, with faster turnaround available with express shipping. You pay nothing until you approve the design. Request yours through the custom quote form, or read how it works first.

    How do you keep foam inserts consistent as the fleet and tool list change?

    Foam inserts stay consistent across a growing maintenance operation when the approved layout is treated as a controlled standard. Customized Foam Inserts keeps your approved layout files on record, so a new technician’s chest, a replacement drawer or an extra line kit can be reordered to match the originals exactly.

    Tool lists do change. A new aircraft type, a revised task card or a replacement tool with a different outline may mean an updated layout. When that happens, request a revised mockup for only the affected drawers, approve it, and roll it out across the chests that need it. Unchanged drawers stay as they are.

    A few habits keep the program tidy over time:

    • Assign one person to approve layout changes so drawers do not drift.
    • Order a small set of spare inserts for drawers that see the heaviest wear.
    • Replace worn inserts before pockets lose their grip on tools.

    This keeps every insert in the hangar telling the same story at a glance.

    Frequently asked questions

    Can custom foam inserts be cut for torque wrenches of different lengths?

    Custom foam inserts can be cut for torque wrenches of any length your chest or case can hold. Customized Foam Inserts lays each wrench out in its own deep pocket, often in a bottom drawer, with a finger pull at the handle. Send the make and model of each wrench so the mockup shows a snug outline that keeps it from sliding when the drawer opens.

    Do foam inserts help technicians spot a missing tool before closing an access panel?

    Foam inserts help technicians spot a missing tool because every item has its own cut outline. An empty pocket shows immediately, especially in a two-tone build with a contrasting base layer. That quick visual check before closing a panel or leaving the aircraft is the main reason maintenance teams adopt foam tool control in drawers and line kits.

    Can one order cover tool chests from different manufacturers?

    One order of foam inserts can cover tool chests from different manufacturers, as long as you list each chest make and model. Customized Foam Inserts sizes every insert to its own drawer, so a mixed fleet of chests can still share a consistent pocket arrangement and color scheme. The mockup shows each chest separately for approval.

    Should safety wire and consumables have pockets in a foam insert?

    Foam inserts can include pockets for safety wire spools, cotter pin boxes and similar consumables, but many hangars keep consumables in a separate drawer. Mixing tools and consumables in one insert can blur the visual check. Customized Foam Inserts can cut a dedicated consumables drawer so tool drawers stay clean and easy to inspect.

    How do foam inserts work with tools that are checked out from a crib?

    Foam inserts work with crib checkout by giving every shared tool a labeled home. When a tool leaves the crib, its pocket stays empty until it returns, and the label shows exactly which item is out. Many teams pair the insert with a sign-out log so the empty pocket and the log entry confirm each other.

    Can foam inserts hold inspection mirrors and flashlights securely?

    Foam inserts can hold inspection mirrors and flashlights in pockets cut to their exact outline, which keeps the glass and lens protected. These small items are among the easiest to leave behind on a job, so Customized Foam Inserts recommends placing them near the front of the drawer or kit where an empty pocket is noticed first.

    What foam color combinations do maintenance teams often choose?

    Maintenance teams ordering foam inserts often choose a dark top layer over a bright base, such as black over red or black over yellow, because the contrast makes empty pockets obvious. Some organizations match the base color to a department or station. Customized Foam Inserts shows the chosen colors on the free mockup so you can compare options.

    Can a foam insert layout be standardized across several hangars or stations?

    A foam insert layout can be standardized across several hangars or stations by approving one master layout per drawer or kit and reordering from it. Customized Foam Inserts keeps approved layouts on file, so every location receives identical inserts. Labels can still vary by station so each set ties back to its own location.

    Are foam inserts suitable for specialty tooling such as rigging fixtures?

    Foam inserts suit specialty tooling such as rigging fixtures, adapters and borescope accessories, either in a deep case or on a foam shadow board. Customized Foam Inserts needs a photo and the outline or model of each fixture to cut accurate pockets. Larger items often fit best on a wall-mounted board near the work area.

    How should worn foam inserts be replaced in a busy hangar?

    Worn foam inserts in a busy hangar should be replaced drawer by drawer from the approved layout on file, so the new insert matches the old pocket arrangement exactly. Keeping a few spare inserts for the most used drawers reduces downtime. Customized Foam Inserts can reorder single drawers once the order minimum of 12 is met across the request.

    Can apprentices and new technicians use the same foam insert layout as senior staff?

    Apprentices and new technicians can use the same foam insert layout as senior staff, which shortens training because every chest looks alike. Customized Foam Inserts can keep the pockets identical and vary only the etched names or chest numbers. A shared layout also makes it easier for supervisors to inspect any drawer in the hangar.

    Get a free mockup for your foam inserts

    Send your logo or idea and the quantity you have in mind. Customized Foam Inserts returns a free mockup within 24 hours, you approve the design before anything is produced, and standard turnaround is about two weeks with faster options available. Get a custom quote.

  • Single-Layer vs Multi-Layer Foam Inserts: Which Build Fits Your Case?

    Single-Layer vs Multi-Layer Foam Inserts: Which Build Fits Your Case?

    Published October 21, 2026. Last updated October 21, 2026.

    Single-layer foam inserts are the right build for shallow drawers and cases where every item sits at one level, while multi-layer foam inserts make sense for deep cases, small parts that hide under larger tools, and kits that need a lift-out tray. Customized Foam Inserts cuts both builds from your item list and shows the layer plan on a free mockup within 24 hours.

    Single-Layer vs Multi-Layer Foam Inserts: Which Build Fits Your Case? - custom printed foam inserts from Customized Foam Inserts
    Custom foam inserts with a logo, produced by Customized Foam Inserts.
    Key facts
    • Single-layer foam inserts suit shallow cases, tool drawers and shadow boards.
    • Multi-layer foam inserts stack separate sheets or step pocket depths for deep cases.
    • A lift-out top layer can turn one deep case into a two-level kit.
    • Every layer plan appears on a free mockup within 24 hours, with unlimited free revisions.
    • Orders start at 12 foam inserts with standard turnaround of about 2 weeks.

    What is the difference between a single-layer and a multi-layer foam insert?

    A single-layer foam insert is one sheet of foam with pockets cut to hold every item at the same level, so you see the whole kit the moment the lid opens. A multi-layer foam insert uses more than one sheet, or several pocket depths in one block, so items can sit at different heights or stack one level above another.

    Both builds start the same way: Customized Foam Inserts takes your case model and item list, lays out the pockets and sends a free mockup within 24 hours. The difference is how the depth of the case gets used. A single layer spends the full depth on one row of tools. A layered build divides that depth so a tall item can drop to the floor of the case while flat or small items rest on a shelf above or in a tray that lifts out.

    There is also a middle option. A single block of foam can be cut with stepped pockets, where a socket rail sits shallow and a drill body sinks deep, all in one piece. That gives you multi-depth storage without separate sheets to lift.

    When is a single-layer foam insert the better choice?

    A single-layer foam insert is the better choice when your case or drawer is shallow, when every item needs to be visible at a glance, and when the kit is checked in and out many times a day. Tool control depends on seeing an empty pocket instantly, and a single layer never hides a missing tool under another one.

    Single-layer builds are the natural fit for:

    • Tool drawers. Roll cab and toolbox drawers are rarely deep enough for stacking, and a tool drawer foam organizer works best when the whole drawer reads as one shadow outline.
    • Shadow boards. Wall and bench boards are single-layer by nature, since every tool hangs in view.
    • Presentation boxes. A product or gift set shown to a customer should open on one clean level, which is why presentation box foam is usually a single sheet.
    • Flat kits. Calipers, gauges, hand tools and test leads lie flat and gain little from a second layer.

    A single layer is also simpler to approve. You check one layout on the mockup, confirm each pocket and move on.

     - one of the custom foam inserts styles from Customized Foam Inserts
    Custom foam inserts from Customized Foam Inserts.

    When does a multi-layer foam insert make more sense?

    A multi-layer foam insert makes more sense when the case is deep, the kit mixes tall and flat items, or small parts would otherwise rattle loose in leftover space. Deep hard cases are the clearest example: a single sheet spends the full depth on a row of pockets, and the space above shorter items goes to waste.

    Layered builds are the usual answer for:

    • Deep hard cases. A hard case foam insert can hold a large meter or power tool on the bottom layer with leads, batteries and adapters in a tray above.
    • Equipment kits with accessories. Field instruments often travel with cables, chargers and manuals. Equipment case foam with a lift-out layer keeps accessories off the main device.
    • Demo and sample kits. A top layer can present the product while the setup gear waits underneath, a common build for trade show and product demo kits.
    • Shared kits. When one person uses the top tray daily and the bottom layer only for service jobs, layering separates everyday items from occasional ones.

    The trade-off is visibility. Anything on a lower layer is out of sight until the top layer comes out, so plan layers around how often each item is used.

    Single-layer vs multi-layer foam inserts at a glance

    The table below compares the two builds on the points buyers ask about most. Use it as a starting point, then confirm the choice on your mockup from Customized Foam Inserts.

    FactorSingle-layer foam insertMulti-layer foam insert
    Best case typeShallow cases, drawers, boardsDeep hard cases and equipment cases
    VisibilityEvery item in viewLower layer hidden until the tray lifts
    Small partsNeed their own pockets on the same levelCan sit in a tray above larger items
    Tool controlFastest empty-pocket checkCheck each layer separately
    Mockup reviewOne layout to approveOne layout per layer to approve
    Changing the kit laterRecut one sheetRecut only the layer that changed

    Neither build is more durable by default. Durability comes from the foam type and the fit of each pocket, both of which are covered in the material comparison and on the mockup itself.

    How do stepped pockets compare to separate stacked layers?

    Stepped pockets and stacked layers both use the depth of a case, but stepped pockets do it in one piece of foam while stacked layers use separate sheets that come apart. Stepped pockets suit kits where everything should still be visible from above. Stacked layers suit kits where you want a second level hidden under a tray.

    With stepped pockets, a CNC router cuts each pocket to the depth its item needs. A tall tool sinks deep, a flat gauge sits shallow, and a finger notch beside each item lets you lift it out. You still see every item from above, so stepped pockets keep the tool-control advantage of a single layer while using more of the case depth.

    With stacked layers, the top sheet is its own insert. You lift it out, often by a finger pull or a cut-in handle slot, and the layer below holds the heavier or less-used items. Each layer can be reordered or recut on its own, which is useful when only the accessories change.

    A quick rule

    If people need to see every item before they leave the bay, choose stepped pockets. If the case holds a main device plus a separate set of accessories, choose stacked layers.

    What should you send so Customized Foam Inserts can recommend a build?

    Send the case make and model, the full item list and photos of the items laid out the way you use them, and Customized Foam Inserts will recommend a single-layer, stepped or stacked build on the mockup. You do not need to decide the build before you ask for a quote.

    1. Name the case. The make and model tells the cutting team the interior depth and shape, including any lid space.
    2. List every item. Include small parts such as bits, batteries, cards and adapters, since these often decide whether a second layer is worth it.
    3. Mark how often each item is used. Daily items belong on the top layer or in a single-layer build. Occasional items can drop to a lower layer.
    4. Say who opens the case. A shared fleet kit may favor single-layer visibility, while a personal service kit can use a tray.
    5. Request a quote. The custom quote form takes your details, and a free mockup arrives within 24 hours.

    You pay nothing until you approve the design, and revisions are unlimited and free, so switching from one build to another at mockup stage costs you only a reply.

    Which build should a first-time buyer choose?

    A first-time buyer should usually start with a single-layer foam insert or stepped pockets unless the case is clearly deep enough to waste space. Those builds are easier to check, easier to train people on and quicker to approve, and the layout can move to stacked layers on a reorder once the kit has been used in the field.

    Choose a multi-layer foam insert from the start when one of these is true: the case holds a large main device plus loose accessories, small parts are already getting lost in the bottom of the case, or the kit has a presentation side and a working side. In those cases a tray pays for itself in time saved digging for parts.

    Whatever you pick, Customized Foam Inserts keeps your approved layout on file, so a pilot order of 12 can be reordered as-is or adjusted layer by layer. Standard turnaround is about 2 weeks, with faster turnaround available through express shipping. To see how the order flows from item list to finished foam, read how it works, or browse the full range of custom foam inserts.

    Frequently asked questions

    How do I know whether my case is deep enough to need a layered foam insert?

    A layered foam insert is worth considering when your tallest item still leaves a band of empty depth above the shorter items. If small parts or accessories could sit in that band, a second layer will use it. Send your case model and item list to Customized Foam Inserts and the mockup will show whether a single layer, stepped pockets or stacked layers fits best.

    Can the top layer of a foam insert lift out as a removable tray?

    Yes, a foam insert can be built with a top layer that lifts out as its own tray. The tray is usually cut with a finger pull or handle slot so you can grab it without tipping items. Underneath, the bottom layer holds heavier or less-used gear. Each tray is drawn on the mockup so you can check the reach and the pocket placement.

    Are single-layer foam inserts easier to keep tidy on a busy job site?

    Single-layer foam inserts are generally easier to keep tidy because every item has one visible pocket and nothing stacks on top of anything else. Crews can spot a missing tool at a glance and wipe dust or debris off one surface. For kits that are opened many times a shift, Customized Foam Inserts often recommends a single layer for that reason.

    Can small parts be stored underneath larger tools in a stacked foam insert?

    A stacked foam insert can store small parts on a lower layer beneath larger tools, but most buyers do the opposite. Small parts are easier to find on a top tray, while the large main tool sits deep in the bottom layer. The mockup lets you test both arrangements and choose the one that matches how your team actually unpacks the case.

    What is a finger pull and why do layered foam inserts often include one?

    A finger pull on a foam insert is a small cutout beside a pocket or along the edge of a tray that gives your fingers room to grip. Layered builds rely on finger pulls so a top layer can be lifted without prying, and so snug items come out cleanly. Customized Foam Inserts places them on the mockup where your hand naturally reaches.

    Should a foam insert for a toolbox drawer be single-layer or layered?

    A foam insert for a toolbox drawer is almost always single-layer, because most drawers are shallow and tool control depends on seeing every outline when the drawer opens. Stepped pockets can still give deeper tools such as ratchets or pliers a better grip. Stacked layers are rarely practical in a drawer, since lifting a tray inside a cabinet is awkward.

    Can I switch from a single-layer to a multi-layer foam insert on a reorder?

    Yes, a foam insert design can move from a single layer to a layered build on a reorder. Customized Foam Inserts keeps your approved layout on file, so the existing pockets become the starting point and a new mockup shows how the items would split across layers. You approve the revised design before anything is cut, and nothing is charged until then.

    Which items belong in the bottom layer of a stacked foam insert?

    The bottom layer of a stacked foam insert works best for the heaviest item, the main device in the kit, or gear you only need on certain jobs. Heavy items low in the case keep it stable when carried. Daily tools, consumables and small accessories go on the top layer so you can reach them without lifting a tray first.

    Can different team members get different top layers over the same base layer?

    A foam insert set can share one base layer design while each team member gets a top layer cut for their own tools. Customized Foam Inserts can include several top-layer layouts in one order as long as each layout is approved on the mockup. The order minimum is 12 foam inserts, and the mix of layouts within that run is up to you.

    Is a solid single-layer foam insert or a layered build better for shipping fragile parts?

    Either foam insert build can protect fragile parts in shipping, because protection comes from a snug pocket and enough foam around each item, not from the number of layers. A layered build helps when parts need separating so they cannot touch. A single layer is simpler for quick packing lines. Customized Foam Inserts will suggest the build on your mockup.

    Do multi-layer foam inserts take longer to produce than single-layer ones?

    Multi-layer foam inserts follow the same order flow as single-layer foam inserts: a free mockup within 24 hours, unlimited free revisions, then standard turnaround of about 2 weeks after approval. Faster turnaround is available with express shipping. The main extra step is reviewing each layer on the mockup, so allow a little more time to check every level.

    How should lid space be handled when choosing between foam insert builds?

    Lid space matters for any foam insert build, because the lid foam is what holds items down when the case closes. With a single layer, lid foam presses directly on the tools. With a stacked build, lid foam presses on the top tray, which then holds the bottom layer in place. Tell Customized Foam Inserts your case model so the lid depth is planned in.

    Get a free mockup for your foam inserts

    Send your logo or idea and the quantity you have in mind. Customized Foam Inserts returns a free mockup within 24 hours, you approve the design before anything is produced, and standard turnaround is about two weeks with faster options available. Get a custom quote.

  • Custom Foam Insert Mistakes: What Goes Wrong on a First Order and How to Avoid It

    Custom Foam Insert Mistakes: What Goes Wrong on a First Order and How to Avoid It

    Published October 12, 2026. Last updated October 12, 2026.

    The biggest custom foam insert mistakes on a first order are loose tool tracings, missing finger pulls, skipped lid foam, ignored case depth and a rushed mockup approval. Customized Foam Inserts catches most of them in the free layout mockup returned within 24 hours, so a few minutes of careful review means your foam inserts fit every tool the first time.

    Custom Foam Insert Mistakes: What Goes Wrong on a First Order and How to Avoid It - custom printed foam inserts from Customized Foam Inserts
    Custom foam inserts with a logo, produced by Customized Foam Inserts.
    Key facts
    • Free layout mockup within 24 hours, with unlimited free revisions
    • You pay nothing until you approve the design
    • Minimum order is 12 foam inserts, ideal for a pilot run
    • Standard turnaround is about 2 weeks; faster turnaround is available with express shipping

    What are the most common mistakes on a first custom foam insert order?

    The most common mistakes on a first custom foam insert order are tracing tools loosely, forgetting finger pulls, skipping the lid layer, ignoring case depth, and approving the mockup without checking it against the real kit. Every one of these shows up after the foam is cut, when a wrench will not seat or a meter rattles in transit.

    None of these problems comes from the foam itself. They come from the information that goes into the layout. A custom foam insert is only as accurate as the tool list, the case model and the photos the buyer sends. When those inputs are complete, the cut foam drops into the case and every tool lands in its pocket on the first try.

    The good news is that each mistake is easy to catch before production. Customized Foam Inserts returns a free layout mockup within 24 hours, offers unlimited free revisions, and asks for no payment until you approve the design. That review window is where a first order succeeds or fails, so the sections below walk through what to check while the layout is still a drawing.

    • Loose or incomplete tool lists
    • No finger pulls or grip space
    • A base insert with no lid foam
    • Cut depth that ignores the case wall
    • A rushed mockup approval

    Why do foam inserts end up with pockets that are too tight or too loose?

    Foam insert pockets end up too tight or too loose when the layout is built from catalog drawings or rough tracings instead of the actual tools in the kit. A socket set from one brand, a replacement meter with a thicker boot, or a tool still in its holster will each change the outline enough to matter.

    Tight pockets are the more frustrating failure. A technician has to pry the tool out, the foam wall tears over time, and the kit stops getting used the way it was meant to. Loose pockets fail more quietly: the tool shifts during transport, edges rub, and the shadow outline no longer tells anyone at a glance that something is missing.

    To avoid both, photograph each tool flat on a contrasting background with a ruler or known object beside it, and send the exact make and model wherever you have it. Include accessories that travel with the tool, such as a battery, a lanyard or a protective cap. If a tool has a version you plan to switch to soon, say so before the layout is drawn rather than after.

     - one of the custom foam inserts styles from Customized Foam Inserts
    Custom foam inserts from Customized Foam Inserts.

    Do custom foam inserts need finger pulls and grip space?

    Yes, most custom foam inserts need finger pulls or a thumb notch beside any tool that sits flush or below the foam surface. Without grip space, a perfectly fitted pocket becomes a pocket nobody can empty quickly, and people start lifting tools by the edges or flipping the whole insert upside down.

    First-time buyers often leave grip space out because the mockup looks cleaner without it. In daily use, a flat bar, a feeler gauge set or a small torque adapter can be almost impossible to pick out of a snug cutout. Round finger pulls work well for small parts, while a longer slot suits flat tools and anything with a narrow handle.

    Tell Customized Foam Inserts who will be using the kit and whether gloves are part of the job. A gloved hand needs wider pulls than a bare one, and a kit used in a dim hangar or on a truck tailgate benefits from pulls placed on the same side every time. The mockup should show every finger pull, so check that each one sits where a hand will naturally reach.

    What goes wrong when a hard case insert skips the lid foam?

    When a hard case foam insert skips the lid layer, tools can lift out of their pockets as soon as the case is turned on its side, carried on a strap or loaded into a vehicle. The base cutouts hold tools sideways, but only a lid layer presses them down and keeps them seated.

    Many buyers order a single cut base insert because the case already came with a thin lid pad, or because the lid foam looks optional on the quote. The problem appears during shipping or on the first field job, when a heavy tool climbs out of its pocket and knocks into its neighbor. Delicate items such as optics, gauges and handheld meters are the most exposed.

    A softer, uncut lid layer is usually enough to solve this. For tall items that stand above the base foam, the lid layer can carry its own matching cutouts so the top of the tool is captured as well. If you are not sure whether your kit needs lid foam, describe how the case travels and the team can recommend a setup. The hard case foam insert page shows how base and lid layers fit together.

    How does case depth trip up a first foam insert order?

    Case depth trips up a first foam insert order when the tallest tool, the foam thickness under each pocket and the lid clearance are not planned together. If the foam is too thin under a pocket, tools bottom out against the case shell; if the stack is too thick, the lid will not latch without crushing something.

    The interior depth printed on a case label is not always the usable depth. Rounded corners, hinge hardware, latch housings and a lid that curves inward all eat into the space a foam insert can occupy. Buyers who measure only the open box often discover the issue when the lid will not close.

    • Measure the inside depth of the base and the lid separately.
    • Note the tallest item and how it sits, lying flat or standing up.
    • Leave a solid layer of foam beneath every pocket so tools never touch the case wall.
    • Mention any wheels, handles or internal brackets that intrude into the case.

    The existing guide on measuring your case covers the measuring steps in detail. The point here is simpler: tell Customized Foam Inserts the case brand and model, and send a photo of the empty case with the lid open, so the layout can account for features a tape measure misses.

    Is it a mistake to approve the foam insert mockup too quickly?

    Approving a foam insert mockup too quickly is one of the most expensive mistakes on a first order, because the approved layout is exactly what gets cut. The mockup is the last point where changes cost nothing, and Customized Foam Inserts offers unlimited free revisions before you sign off.

    A careful review takes only a few minutes when the right person does it. The buyer who placed the order is often not the person who uses the kit every day, so forward the mockup to a technician, crew lead or warehouse manager and ask them to check it against the real tools on a bench.

    1. Confirm every tool on your list appears in the layout, and nothing extra does.
    2. Check that the orientation of each tool matches how people actually grab it.
    3. Look for finger pulls beside flat and flush tools.
    4. Confirm any labels, part numbers or a logo are spelled correctly.
    5. Check that heavy tools sit near the hinge side or the center, not at a far edge.
    6. Ask whether an empty spare pocket would help with tools that are added later.

    Only approve once the person who will open the case every day has signed off. That habit catches more problems than any measurement.

    What other first-order mistakes should foam insert buyers watch for?

    Beyond fit and layout, foam insert buyers commonly pick the wrong foam color for the job, forget to plan for tool changes, and order for one case when several models are in use. Each of these is easy to settle while the quote is being prepared.

    MistakeWhat happensHow to avoid it
    One foam color for everythingMissing tools are hard to spot in a dark caseAsk about a two-tone foam with a contrasting base layer that shows through empty pockets
    No plan for tool upgradesA new meter or driver will not fit the old pocketAdd a spare pocket or plan a new layout when the tool changes
    Mixed case models on one layoutInserts fit some cases and not othersList each case model separately so each gets its own layout
    No labels in the foamSimilar tools go back in the wrong pocketsRequest etched tool names or part numbers
    Wrong foam for the contentsElectronics or delicate parts need different protectionDescribe the contents and ask which foam suits them

    Material choice has its own guide on the blog, and so does anti-static foam for electronics. For a first order, the main step is to describe what goes in the case and how it is used, then let the layout and foam recommendation follow from that.

    How can you make your first custom foam insert order go right?

    The surest way to get a first custom foam insert order right is to send complete inputs up front, use the free mockup as a real review step, and start with a run that fits your actual need. The minimum order at Customized Foam Inserts is 12 foam inserts, which lets a team test a layout across a small group of cases before outfitting everything.

    Gather the case brand and model, a clear tool list, flat photos of each tool, and a short note on how the kit travels and who uses it. Request a quote, review the mockup with the people who will use it, and ask for changes as often as you need. You pay nothing until you approve the design, and standard turnaround is about 2 weeks after approval, with faster turnaround available with express shipping.

    Once the first run is in use, collect feedback from the field before reordering. Small changes, such as a wider finger pull or a relocated meter, are simple to make in the saved layout. Whether you are fitting tool drawer foam organizers, custom shadow boards or camera and drone case foam, the same checklist applies. When you are ready, request a custom quote and see the full process on the how it works page.

    Frequently asked questions

    What should I send with my first custom foam insert request?

    A first custom foam insert request should include the case brand and model, a complete tool list, flat photos of each tool beside a ruler, and a short note on how the kit travels. Customized Foam Inserts uses those details to draw an accurate layout and return a free mockup within 24 hours, so complete inputs save rounds of revision later.

    Can foam inserts be cut for tools that are still in their holsters or boots?

    Foam inserts can be cut for tools in holsters, boots or protective covers, as long as the layout is drawn around the tool exactly as it will be stored. Tell Customized Foam Inserts whether each tool travels with its cover on, because a rubber boot or sheath changes the outline enough to make a bare-tool pocket too tight.

    How do I check a foam insert mockup if I am not the person using the tools?

    Checking a foam insert mockup works best when you forward it to the technician or crew lead who opens the case every day. Ask them to compare the drawing against the real tools on a bench, confirm orientation and grip space, and flag anything missing. Approve only after they sign off, since revisions are free until then.

    Should heavy tools go in a particular spot in a foam insert?

    Heavy tools in a foam insert are usually best placed near the center or the hinge side of the case rather than at a far edge. That placement keeps the case balanced when carried by the handle and reduces strain on the foam walls. Mention your heaviest items when requesting a layout so they can be positioned sensibly.

    What is a two-tone foam insert and why would a first-time buyer want one?

    A two-tone foam insert stacks a thin contrasting color layer beneath the main foam, so an empty pocket shows a bright outline. First-time buyers often choose this for tool control, because a missing wrench is obvious at a glance. Ask Customized Foam Inserts about color options when you request a quote.

    Can I leave an empty pocket in a foam insert for a tool I plan to buy later?

    Leaving an empty pocket in a foam insert for a future tool is a sensible choice when you know an addition is coming. Share the planned tool's make and model so the pocket matches it, or ask for a general spare pocket sized for a similar item. Planning ahead now avoids recutting the whole insert later.

    What happens if my foam insert does not fit after it arrives?

    A foam insert that does not fit after arrival should be reported with photos of the insert in the case and of the specific pockets that are wrong. Customized Foam Inserts can compare the result against the approved mockup and the details provided. Careful mockup review before approval is the best way to prevent fit problems entirely.

    Do foam inserts for gloved users need different cutouts?

    Foam inserts for gloved users generally need wider finger pulls and slightly more generous grip space around small tools. Bulky gloves make it hard to pinch a flat tool out of a snug pocket. Tell Customized Foam Inserts if the kit is used with gloves so the layout includes pulls that a gloved hand can actually use.

    Is it better to start with a small run of foam inserts before outfitting every case?

    Starting with a small run of foam inserts is a smart move for a first order, especially for a large fleet. The minimum order is 12, so a team can field-test the layout, gather feedback and adjust the saved design before ordering for every case. Small changes after a pilot are far easier than correcting a full run.

    Can tool names or part numbers be added to a foam insert to prevent mix-ups?

    Tool names or part numbers can be etched into a foam insert beside each pocket, which helps prevent similar tools from going back in the wrong place. Labels are especially useful for socket sizes, torque adapters and calibrated instruments. Check the spelling of every label on the mockup from Customized Foam Inserts before approving the design.

    Why does my case brand matter when ordering a foam insert?

    Your case brand matters for a foam insert because interior shapes vary between manufacturers, even when outside dimensions look similar. Rounded corners, hinge hardware and lid curves change the usable space. Naming the exact brand and model lets the layout match the case profile, so the foam drops in cleanly and the lid closes without crushing tools.

    Get a free mockup for your foam inserts

    Send your logo or idea and the quantity you have in mind. Customized Foam Inserts returns a free mockup within 24 hours, you approve the design before anything is produced, and standard turnaround is about two weeks with faster options available. Get a custom quote.

  • How Many Custom Foam Inserts Should You Order? Planning Spares, Fleets and Reorders

    How Many Custom Foam Inserts Should You Order? Planning Spares, Fleets and Reorders

    Published October 5, 2026. Last updated October 5, 2026.

    Order one custom foam insert for every case, drawer or box you run today, then add spares for wear, damage and growth. At Customized Foam Inserts the minimum order is 12 foam inserts, so a small crew can start right-sized, approve a free mockup within 24 hours, and reorder the same saved layout whenever the fleet grows.

    How Many Custom Foam Inserts Should You Order? Planning Spares, Fleets and Reorders - custom printed foam inserts from Customized Foam Inserts
    Custom foam inserts with a logo, produced by Customized Foam Inserts.
    Key facts
    • Minimum order is 12 foam inserts per run
    • Free layout mockup within 24 hours, with unlimited free revisions
    • Standard turnaround is about 2 weeks; faster turnaround is available with express shipping
    • Approved layouts can be reordered later so new kits match the originals
    • You pay nothing until you approve the design

    How do I count how many foam inserts I actually need?

    Count foam inserts by container, not by tool. Every hard case, tool drawer, presentation box or shadow board position that needs a cutout gets its own insert, and a single case with a lid and a base usually needs two pieces of foam: a cut base layer and a softer lid layer that holds the tools down.

    Walk the floor or the warehouse with a simple list before you request a quote. Write down each container model, how many of that model you run, and whether the tool set inside is identical from unit to unit. Identical kits share one layout, which keeps the order simple. Kits that differ even slightly, such as a technician who carries an extra meter, need their own layout or a shared layout with an empty spare pocket.

    • Cases: one base insert per case, plus a lid insert if the lid needs to press tools in place.
    • Drawers: one insert per drawer, counted per toolbox, not per cabinet.
    • Multi-layer kits: count each layer as its own piece of foam.
    • Packaging: count units shipped over the period you want covered, not units on the shelf.

    How many spare foam inserts should I add to the order?

    Add spare foam inserts for anything that will realistically be lost, damaged or added before your next reorder. Foam that rides in a service van, sits in a dusty shop or gets opened dozens of times a shift wears faster than foam that lives in a display box, so the spare count follows how hard the kits are used.

    Think about three sources of demand beyond today’s count. First, wear: corners and finger pulls on heavily used drawers tear over time. Second, damage: a dropped case, a solvent spill or a crushed lid can ruin one insert without hurting the rest. Third, growth: a new hire, a new truck or a second shift creates a new kit that should match the existing ones exactly.

    A few spares cost far less in downtime than a technician working out of a loose bag while a replacement is cut. Spares also let you swap a torn insert on the spot, which keeps a shadow board or drawer audit-ready instead of showing an empty gap.

     - one of the custom foam inserts styles from Customized Foam Inserts
    Custom foam inserts from Customized Foam Inserts.

    What is the smallest order that makes sense for a small team?

    The smallest order at Customized Foam Inserts is 12 foam inserts, which suits a small field crew, a single lab, or a pilot run of a new product box. Twelve pieces is enough to outfit a handful of cases with lid layers and still keep a couple of spares on the shelf.

    If you need fewer kits than that today, use the extra pieces deliberately rather than leaving them in a corner. Common ways to fill out a first run include:

    • Lid layers for every case, so tools stay seated during transport.
    • Spare base inserts for the cases that travel the most.
    • A test insert for a second case model you plan to add next quarter.
    • Display or presentation box foam for a sales sample alongside the working kits.

    Mixing a working kit with a presentation piece works best when both use the same layout family, so check with the team during the mockup stage. Because the mockup arrives within 24 hours and revisions are free, you can try the layout on the first case before committing to how the rest of the run is split.

    Should I order all my case foam at once or in stages?

    Order foam inserts in stages when the tool set or the case model is still changing, and order everything at once when the kit is settled. A staged approach protects you from cutting a full fleet of foam around a layout that changes the moment a new tool is issued.

    A practical pattern is a pilot run first. Cut the minimum for one crew or one line, let the people who use the kits work with them for a few weeks, and collect feedback on pocket depth, finger pulls and tool order. Then approve a revised layout and roll it out across the rest of the fleet.

    SituationBetter approachWhy
    New tool kit, layout untestedPilot run, then fleet orderUsers find fit issues before every case is cut
    Established kit, same case model everywhereSingle full orderOne approval, one production run, consistent foam
    Fleet growing month to monthInitial order plus scheduled reordersSaved layout keeps new kits identical
    Product packaging for a launchLaunch quantity plus a reorder triggerMatches inserts to real sales instead of forecasts

    How do I plan foam inserts for different case models in one order?

    Plan mixed fleets by grouping foam inserts by case model and kit contents, then treat each group as its own layout. A company running two hard case brands and one tool chest has at least three layouts, even if the tools inside overlap.

    For each group, list the case model, interior depth, the tools or products it holds, and the quantity. Customized Foam Inserts can match foam to the case brand and depth, so accurate case details matter more than guessing a size. The guide on hard case foam inserts and the page on tool drawer foam organizers show the main formats side by side.

    1. Group containers by model and depth.
    2. Within each group, confirm the kit contents are identical.
    3. Split any group where the contents differ into its own layout.
    4. Assign a quantity, including spares, to each layout.
    5. Send the grouped list with the quote request so every layout is mocked up together.

    Grouping this way also makes reorders easy, because each layout has a clear name and a known quantity that you can repeat.

    What should I plan for when ordering packaging foam inserts?

    Packaging foam inserts are planned around shipments, not containers, so the quantity follows how many products you expect to ship before the next reorder. A presentation box or shipper that holds a product needs a fresh insert every time a unit leaves the building.

    Start with a realistic shipping estimate for the period you want covered and add a buffer for damaged or rejected boxes during packing. Brands that launch a new product often order a first run sized to the launch, then reorder once real sales data replaces the forecast. That avoids storing piles of foam for a product that sells slower than planned, and it avoids running out when a product sells faster.

    See the pages on packaging foam inserts and presentation box foam for format options. Keep the approved layout on file so a reorder matches the original packaging exactly, which matters when the unboxing experience is part of the brand.

    How far ahead should I reorder foam inserts so kits never go without?

    Reorder foam inserts while you still have spares on the shelf, not after the last one is used. With standard turnaround at about 2 weeks, set a reorder point that leaves enough spares to cover any losses during that window, and use express shipping when the gap is tighter.

    Simple habits keep reorders painless:

    • Name every approved layout and note which case or drawer it fits.
    • Keep a short count of spares by layout, updated when one is used.
    • Trigger a reorder when spares for a layout drop to the level you decided on.
    • Bundle reorders for several layouts into one request when timing allows.

    Because Customized Foam Inserts keeps approved layouts, a reorder does not restart the design process. You confirm the layout and quantity, and production can begin. If a tool has changed since the last run, request a revised mockup first, which still arrives within 24 hours.

    What information should I send so the quote matches my real quantity?

    Send the grouped list of containers, the quantity for each layout including spares, and any timing constraint, so the quote for your foam inserts reflects the real job. Quotes built on a vague total usually change once layouts are counted, which slows everything down.

    A complete request includes the case or drawer make and model, interior depth if known, a photo or list of the tools or products, the quantity per layout, and the date the kits are needed. The page on how it works explains each step from request to delivery, and the custom quote form collects these details in one place.

    You pay nothing until you approve the design, so it is safe to send a detailed request early and refine quantities after the mockup.

    Frequently asked questions

    Do I need a separate foam insert for the lid of every case?

    A lid foam insert is worth ordering for any case that travels, because it presses tools down into their pockets so they do not shift or rattle. Cases that stay on a bench or shelf can often skip the lid layer. Count lid pieces separately from base pieces when you total the order, since each one is its own piece of foam.

    Can one order include foam inserts for several different case models?

    Foam inserts for several case models can go on one order at Customized Foam Inserts, with each model treated as its own layout. Send the make, model and quantity for each group so every layout is mocked up together. The minimum of 12 applies to the order, so mixing a few layouts in one run is a practical way to outfit a varied fleet.

    How do I handle a technician who carries extra tools in the same case model?

    Foam inserts for a technician with extra tools can either use a separate layout or a shared layout with a spare pocket. A separate layout gives every tool a tight cutout, while a spare pocket keeps one design across the fleet. Decide based on how many technicians carry the extra tools and whether the extra kit is likely to stay permanent.

    What happens to my layout files after the first order ships?

    Foam insert layouts approved at Customized Foam Inserts are kept on file, so a later reorder can repeat the exact same design without starting over. Name each layout by case model or kit so reordering is quick. If a tool changes between runs, ask for a revised mockup, which still arrives within 24 hours with unlimited free revisions.

    Is a pilot run worth it before outfitting a full fleet of cases?

    A pilot run of foam inserts is worth it when the tool kit or case model is new. Users catch issues with pocket depth, finger pulls and tool order before every case is cut. Once the layout is settled, the full fleet can be ordered from the revised design, which keeps every kit consistent and avoids replacing foam that never fit well.

    How do I estimate spares for drawers that are opened all day?

    Spare foam inserts for high-use drawers should reflect how quickly corners and finger pulls wear in your shop. Look at how often existing foam has been replaced, then cover that pace until the next planned reorder. Heavily used tool drawer foam usually deserves more spares than presentation or storage foam that is rarely handled.

    Should packaging foam be ordered to forecast or to confirmed sales?

    Packaging foam inserts are safest ordered to a realistic launch quantity first, then reordered once real sales replace the forecast. Ordering everything to an optimistic forecast leaves foam in storage if sales are slower, while ordering too little risks running out during a busy period. Keeping the approved layout on file makes the follow-up run match the original boxes.

    Can I add more foam inserts to an order after approving the mockup?

    Foam insert quantities can usually be adjusted before production starts, so contact Customized Foam Inserts as soon as you know the count has changed. Once the run is cutting, extra pieces are best handled as a quick reorder from the saved layout. Confirming quantities at the mockup stage avoids delays and keeps the original turnaround on track.

    What is the best way to track spare foam inserts in a busy shop?

    Spare foam inserts are easiest to track with a short list by layout name, showing how many spares remain and where they are stored. Update the count when a spare is used and set a reorder point for each layout. Storing spares flat and clean, away from solvents and sharp tools, keeps them ready to drop in.

    Do shadow boards and drawer foam need to be ordered together?

    Shadow boards and drawer foam inserts do not need to be ordered together, but combining them helps when a workplace organization project covers both. One request at Customized Foam Inserts lets the layouts share colors and labeling so the workspace looks consistent. If budgets are split, order the area that sees the most use first and add the rest later.

    How does a growing team keep new kits identical to the originals?

    Foam inserts for new kits stay identical when every reorder uses the approved layout on file and the same case model as the originals. Record the layout name with each kit and check whether any tools have changed before reordering. If they have, approve a revised mockup first so new and existing kits stay interchangeable across the team.

    Get a free mockup for your foam inserts

    Send your logo or idea and the quantity you have in mind. Customized Foam Inserts returns a free mockup within 24 hours, you approve the design before anything is produced, and standard turnaround is about two weeks with faster options available. Get a custom quote.

  • Custom Foam Inserts: Pricing, MOQs & Lead Times (2026)

    If you’ve started pricing out custom foam inserts, you’ve probably noticed the quotes don’t line up. One supplier wants a 500-unit minimum, another will cut a single prototype, and the per-unit price swings from a few dollars to well over a hundred depending on whether you’re describing pre-scored pick-and-pluck foam or a CNC-routed tray with multiple cavity depths. None of that is arbitrary — it comes down to a handful of variables that are worth understanding before you request a quote.

    This guide walks through what actually drives the cost of custom foam inserts: the difference between pick-and-pluck and CNC-cut foam, typical minimum order quantities across suppliers, standard versus rush lead times, and the material tradeoffs between polyethylene and polyurethane. The numbers below come from supplier pricing pages and foam manufacturer spec sheets, cited where they’re used, so you can walk into a quote request already knowing what’s reasonable.

    Whether you’re protecting a single high-value instrument or outfitting a production run of retail cases, the goal is the same: match the foam type, cut method, and order volume to what the product actually needs, instead of over-paying for precision you don’t require or under-protecting gear that can’t afford a shipping ding.

    Polyurethane foam density
    ~1.6 lb/ft³
    Polyethylene foam density
    ~2.2 lb/ft³
    Custom CNC-cut lead time
    2–6 weeks
    Rush order premium
    20–50% above standard

    Source: Cobra Foam Inserts, Amcon Foam, and CH Ellis foam specification pages, accessed 2026

    What custom foam inserts actually cost

    The single biggest cost driver isn’t the size of your case — it’s the cutting method. Pre-scored pick-and-pluck foam, the kind sold in a grid so you can pull cubes out by hand, is the cheapest option because there’s no design or tooling step involved. A replacement pick-and-pluck set for a standard tool case or Pelican-style box typically runs $15–$30. Custom CNC-routed inserts, cut to the exact silhouette of your product with no hand-removal required, start around $45 and climb toward $120 or more once you add multiple cavities, foil lamination, or recessed layers.

    That gap exists because CNC cutting requires a digital layout of your product (or a physical trace), programmed tool paths, and usually a design-review round before the first piece gets cut. You’re paying for precision and repeatability, not just material. For a single expensive instrument or a demo unit that travels constantly, that precision earns its cost back the first time the case gets dropped. For a mixed tool kit that gets reconfigured every few months, it usually doesn’t.

    Custom CNC-cut foam inserts cost roughly 2–4x more than pick-and-pluck, driven by design and tooling time rather than material.
    Foam Type Typical Price Range Best Suited For
    Pick-and-pluck foam (pre-scored grid) $15 – $30 per replacement set Mixed gear, budget tool kits, frequent reconfiguration
    Custom CNC-cut foam insert $45 – $120+ per insert High-value or fragile equipment, cases with regular impact or shipping
    Custom CNC-cut foam inserts cost roughly 2–4x more than pick-and-pluck, driven by design and tooling time rather than material.Source: CH Ellis, “Pick and Pluck Foam vs Custom Cut Foam,” and Artisan Foam, “Pick and Pluck vs Custom Cut Foam for Tool Kits” (chellis.com, artisanfoam.com), 2026

    Minimum order quantities: what to expect

    If you’re outfitting a single case, you don’t need to talk to a factory — small-batch foam fabricators will cut one-off inserts with no minimum, though the per-unit price is highest at that volume. Once you’re packaging a product for retail or outfitting a fleet of cases, most suppliers set a minimum somewhere between 300 and 500 units, or an equivalent dollar minimum, because their production line is set up for batch runs, not singles.

    Volume also changes your unit economics fast. A supplier quoting $18 per insert at 100 units might quote $9 at 1,000 units once the design and setup cost is spread across a larger run. If you’re close to a supplier’s MOQ threshold, it’s often worth asking whether rounding up to their minimum actually lowers your total spend.

    MOQs range from zero for small-batch fabricators to 500 units for suppliers set up around batch production.
    Supplier Minimum Order Notes
    PackMojo 300 units/size with a box order; 500 for standalone inserts Minimum drops when foam ships alongside a matching box order
    Beyond Case 500 units, or a $1,000 order minimum Whichever threshold is reached first
    Custom Foam Parts No stated minimum Priced per-unit at low volume; better rates at scale
    PakFactory Varies by foam type, thickness, and design complexity No flat MOQ published — quote-based
    MOQs range from zero for small-batch fabricators to 500 units for suppliers set up around batch production.Source: PackMojo, Beyond Case, Custom Foam Parts, and PakFactory product pages, accessed August 2026

    Lead times: standard vs. rush

    Simple, single-cavity custom foam inserts commonly ship in 10–20 business days once the design is approved. Multi-layer trays, foam with laminated fabric facing, or designs that need several rounds of proofing push that out to 2–6 weeks, since each layer typically requires its own cut pass and glue-up step before the insert is finished.

    Rush production is available from most fabricators, but it isn’t cheap: expect a 20–50% premium over standard pricing to cut the timeline by roughly half. If you’re on a hard deadline — a trade show, a product launch — it’s worth asking for a rush quote up front rather than assuming standard timing will work, since foam fabrication queues fill up seasonally the same way print shops do.

    The fastest path to a shorter lead time that doesn’t cost extra is usually design simplicity: fewer cavity depths, no lamination, and a layout confirmed before cutting starts. Every round of revisions after the first proof adds days back onto the schedule.

    Choosing foam density and material

    Polyurethane and polyethylene look similar at a glance but behave very differently once they’re protecting something. Polyurethane is an open-cell foam, roughly 1.6 lb/ft³, that’s soft and compresses easily — it’s the standard choice for pick-and-pluck kits and general equipment cases because it cushions well without adding much weight. Polyethylene is a closed-cell foam, roughly 2.2 lb/ft³, noticeably firmer and denser, and it doesn’t absorb water the way open-cell polyurethane does. That makes it the better call for cases that see moisture, heavier payloads, or sharp-edged components that would compress an open-cell foam permanently over time.

    Thickness matters as much as density. A cavity that’s too shallow lets a component’s edges contact the box wall on impact; too deep and the item can shift inside its pocket during transit. Most fabricators will ask for your product’s exact dimensions plus a small clearance allowance, usually a few millimeters per side, to account for how tightly the foam grips the item once it’s cut.

    Getting a quote that matches what you need

    Before requesting pricing on custom foam inserts, have three things ready: exact outer case dimensions, a list of everything that needs its own cavity (including cables, batteries, and small accessories), and your realistic order volume for the next 6–12 months. Suppliers price faster and more accurately when they’re not guessing at any of the three.

    It’s also worth asking directly whether a supplier’s quote includes design time, tooling, and a physical proof, since those line items sometimes get bundled into the per-unit price and sometimes get billed separately. A quote that looks cheaper on paper can end up costing more once a $150–$300 design fee gets added at checkout. Comparing two or three quotes side by side, with the same case dimensions and cavity list, is the only reliable way to see what a given order actually costs.

    Finally, order a single sample or prototype before committing to a full production run, even if it adds a few days to your timeline. A foam layout that looks correct on a CAD file can still leave a component pinched or loose once it’s cut in real material — catching that on one piece is far cheaper than catching it on 500.

    Frequently asked questions

    How much do custom foam inserts cost per unit?

    Pick-and-pluck foam typically runs $15–$30 per replacement set. Custom CNC-cut inserts run $45–$120 or more per unit, depending on cavity count, foam thickness, and whether the insert includes lamination or multiple layers. Volume pricing drops significantly above a few hundred units.

    Is there a minimum order quantity for custom foam inserts?

    It depends on the supplier. Small-batch foam fabricators will cut a single custom insert with no minimum. Suppliers set up for batch production commonly set minimums between 300 and 500 units, or an equivalent dollar minimum around $1,000.

    How long does it take to get custom foam inserts made?

    Simple, single-cavity inserts typically ship in 10–20 business days after design approval. More complex, multi-layer designs can take 2–6 weeks. Rush production is usually available for a 20–50% premium over standard pricing.

    Should I choose polyethylene or polyurethane foam?

    Polyurethane (about 1.6 lb/ft³) is softer and lighter, well suited to fragile or lightweight gear. Polyethylene (about 2.2 lb/ft³) is denser, closed-cell, and moisture-resistant, making it the better choice for heavy, sharp-edged, or moisture-exposed equipment.

    What information do I need before requesting a foam insert quote?

    Have your exact case dimensions, a complete list of items that need individual cavities, and your expected order volume ready. Suppliers can quote faster and more accurately with all three up front, and it lets you compare quotes on an apples-to-apples basis.

    The bottom line

    Custom foam inserts don’t have a single market price — the cost depends on cutting method, order volume, foam density, and how tight your timeline is. Pick-and-pluck foam is the fast, low-cost option for gear that gets reconfigured often; CNC-cut inserts cost more but protect high-value or fragile equipment far more precisely. Knowing the typical ranges for pricing, MOQs, and lead time before you request a quote makes it much easier to spot a fair number when you see one, and to ask suppliers the right follow-up questions instead of taking the first quote at face value.

  • Custom Foam Inserts: Materials, Sizing & Branding Guide

    Custom Foam Inserts: Materials, Sizing & Branding Guide

    Custom Foam Inserts: A Materials, Sizing, and Branding Guide

    Getting custom foam inserts right comes down to three decisions: the material, the size or spec, and how you brand them. Make those well and you end up with custom foam inserts that protect and present your product, reinforce your brand, and land on budget. This guide walks through the material options, how to size and spec your order, and how to decorate custom foam inserts so they do real work for your brand rather than just checking a box.

    Whether you are ordering your first run or reordering at scale, the same fundamentals apply. Choosing custom foam inserts deliberately — material to job, size to product, decoration to brand — is what separates an order you are proud of from one you settle for.

    Why custom foam inserts matter for your brand

    Custom foam inserts are more than a commodity; they are a touchpoint shippers experience directly. A well-chosen, well-branded option signals quality and attention to detail, while a generic one quietly undercuts an otherwise strong product. Because custom foam inserts are seen and handled, they carry your brand into the world every time they are used.

    That visibility is exactly why it pays to spec custom foam inserts intentionally. The material sets the feel, the size sets the fit and cost, and the decoration sets the impression — and getting all three aligned turns a functional item into a genuine brand asset.

    Materials and options compared

    The common materials for custom foam inserts each trade off durability, print quality, and cost: poly / co-extruded film, recycled content, bubble-lined, and kraft / paper-based. The right pick depends on how the foam inserts will be used, the look you want, and your budget. The chart and table below compare the main options so you can match material to job.

    How common foam inserts materials compare on durability, print quality, and value.
    How common foam inserts materials compare on durability, print quality, and value.

    As a rule of thumb, choose a recyclable or natural material when eco positioning matters, a coated or laminated option when you want vivid full-color print, and a premium build when the foam inserts is part of a gift or high-end presentation. When in doubt, request a sample so you can judge feel and print before committing to a full run.

    Material / option Best for
    Poly / co-extruded film lightweight, tear- and water-resistant
    Recycled content lower-impact material for eco brands
    Bubble-lined cushioning for fragile or higher-value items
    Kraft / paper-based curbside-recyclable mailing option

    Sizing and specs

    Sizing is where many foam inserts orders go wrong, so measure before you order. Custom foam inserts typically range from a small 6×9 in mailer up to a large 19×24 in for bulky items, and the right size depends on the product or use they serve. Too small and the fit is tight or the product is exposed; too large and you pay for material you do not need and lose a clean, intentional look.

    When a measurement falls between standard options, size to the product with a small margin rather than guessing. Confirming the size on a proof or sample before a large run prevents the costly mistake of a full order that does not fit, which is far more expensive to fix than a five-minute check up front.

    Branding and decoration

    Decoration is what turns a plain foam inserts into a branded one. Flexographic printing applies logos and patterns cost-effectively across the run, with full-color options for detailed branding. Match the method to your artwork and budget: simple logos reproduce cleanly and cheaply, while detailed, full-color designs shine with the right process on the right material. Keep the artwork vector where possible and confirm the print area for your chosen size.

    Restraint usually reads as premium. A clean logo, one or two brand colors, and quality material almost always look more considered than a busy, over-printed design. Approving a proof before the run protects both the look and the budget, especially on a large order of custom foam inserts.

    Ordering and budget

    Per-unit cost on custom foam inserts falls steadily with volume as setup amortizes across more pieces, so ordering for real demand rather than a token first batch is usually the efficient move. The curve below shows how pricing typically improves with quantity, which helps you plan an order that balances cash and cost.

    Typical per-unit foam inserts pricing as order quantity increases.
    Typical per-unit foam inserts pricing as order quantity increases.
    Ordering for a recurring need? A single larger run lowers the unit cost and keeps your branding consistent, while a small overage covers reorders and the occasional damaged piece without a rush order.

    Common mistakes to avoid

    A few avoidable missteps account for most disappointing foam inserts orders. Ordering before measuring is the biggest, followed by choosing a material for price alone without considering how the foam inserts will actually be used, and skipping the proof on a large run. Each is easy to prevent with a few minutes of planning, and each is expensive to fix once a full order is produced.

    The other common trap is over-designing the artwork. Cramming in too many colors, effects, or details can muddy the print and raise the cost, especially on textured or recycled materials. Simplifying the design to a clean, legible mark almost always improves both the look and the price of your custom foam inserts.

    Frequently asked questions about custom foam inserts

    What material is best for custom foam inserts?

    It depends on the use: choose a recyclable or natural material for eco positioning, a coated or laminated option for vivid full-color print, and a premium build for gifting or high-end presentation. Request a sample to judge feel and print before a full run of custom foam inserts.

    How do I choose the right size?

    Measure the product or use the foam inserts serves, then size to it with a small margin so the fit is clean without wasting material. When a measurement falls between standard options, size up slightly and confirm the size on a proof before ordering in volume.

    How are custom foam inserts branded?

    Flexographic printing applies logos and patterns cost-effectively across the run, with full-color options for detailed branding. Match the method to your artwork and budget, keep the art vector where possible, confirm the print area for your size, and approve a proof so the finished custom foam inserts match your intent.

    How does pricing work, and is there a minimum?

    Per-unit cost drops with quantity as setup amortizes across the run, so larger orders are more cost-effective. Order for real demand plus a small overage rather than a token batch, and consolidate recurring needs into one run for the best price.

    Can I get a sample or proof before ordering?

    Yes, and it is strongly recommended. A physical sample lets you judge material and print, and a digital or physical proof confirms your artwork, color, and size before a full run — a small step that prevents a costly mistake on a large order.

    What do you need to quote custom foam inserts?

    To quote accurately we need the size or the product they serve, the quantity, your material preference, and your artwork or a description of the branding. With those details we can recommend the right material and size and give you pricing for the run, and a proof follows once the order is confirmed.

    Whatever you order, send vector artwork, confirm material and size, and approve a proof before production. For help matching custom foam inserts to a specific use, see our companion guide, our How to Choose Custom Foam Inserts for Your Brand, and explore our our shop to start your order.

    Ready to order custom foam inserts?

    Tell us your product, quantity, and branding and we’ll match the material, size, and decoration for you.

    Get a Quote