Custom foam inserts are only as accurate as the files behind them. Customized Foam Inserts needs your case model, a complete item list and a clean outline for every tool, from an overhead photo with a scale reference, a paper tracing or a CAD file, plus any logo or label text. Send those and a free mockup comes back within 24 hours.
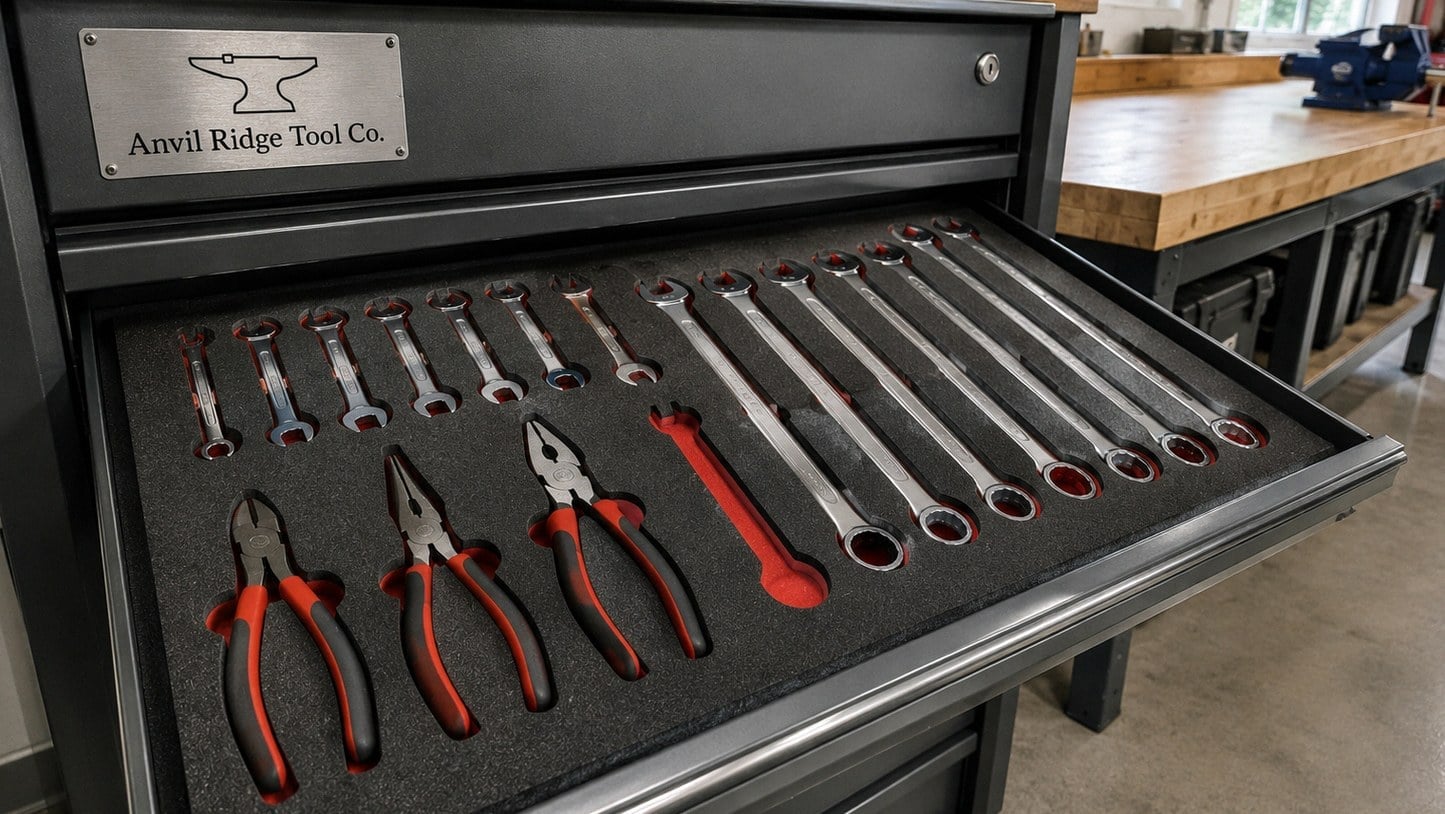
- Overhead photos with a ruler or printer paper for scale give accurate pocket outlines.
- CAD or DXF files are the most precise outline source for products and parts.
- Vector logo files give the cleanest etched edge in foam.
- Free mockup within 24 hours, with unlimited free revisions.
- Minimum order of 12 foam inserts, with standard turnaround of about 2 weeks.
What files does Customized Foam Inserts need to lay out a custom foam insert?
Customized Foam Inserts needs three things to lay out a custom foam insert: the case or drawer model, a list of every item that goes inside, and a clear outline source for each item. The outline source can be a flat overhead photo, a tracing on paper, or a CAD or DXF file from the tool or product maker. With those in hand, the team builds a layout and returns a free mockup within 24 hours.
Think of the layout file as artwork for foam. A printed product needs a logo file; a foam insert needs the shapes of your tools, the order you want them in and any labels or logos you want etched into the surface. The better those inputs are, the fewer revision rounds you need before cutting.
A complete layout package usually includes:
- The case brand and model, or the drawer make and size class, so the outer shape and depth are right.
- An item list with names, written the way your team refers to each tool.
- Outline sources: overhead photos, tracings or CAD files for every item.
- Notes on grouping, finger pulls and any item that must sit on top.
- Label text, part numbers or a logo file if you want etching.
How do you photograph tools so they can be traced into foam insert pockets?
Photograph tools for a foam insert from directly overhead, on a plain contrasting background, with a ruler or a sheet of printer paper in the frame for scale. A straight-down shot keeps outlines true, the contrast lets the edge read cleanly, and the reference object lets the layout team size each pocket correctly against the case.
Angled photos are the most common reason a pocket comes back too tight or too loose. When a phone tilts, the near end of a wrench looks wider than the far end, and that distortion carries straight into the cut outline. Stand over the table, hold the phone level and fill most of the frame with the tool.
Good tool photos for foam insert tracing follow a short routine:
- Lay a white sheet for dark tools or a dark sheet for bright or chrome tools.
- Place the tool flat, in the orientation you want it to sit in the case.
- Add a ruler or a full sheet of printer paper next to it for scale.
- Shoot from directly above with even light and no hard shadows.
- Take a side shot too if the tool has a raised handle, a trigger or a dial.
Side shots matter because a foam insert pocket has depth as well as outline. A drill with a battery pack, a torque wrench with a raised scale or a meter with a probe holder all need stepped pockets, and the side view shows where the step goes.
Can I send CAD or DXF files instead of photos for a custom foam insert?
Yes, CAD and DXF files are the most accurate outline source for a custom foam insert, and Customized Foam Inserts can work from them directly. Product designers, engineering teams and manufacturers packing their own parts often already have a drawing, and an outline exported from that drawing removes any guesswork about edges and curves.
When you send CAD files, export the outer profile of each part as seen from the angle it will rest in the foam. A full assembly with internal features is harder to read than a simple outline. If a part will lie on its side in the case, export that side view rather than the top view used for machining.
Mixed packages work well too. Many orders combine a DXF for a custom product with overhead photos of off-the-shelf tools such as chargers, cables and hand tools that have no drawing. Tell the team which file belongs to which item so nothing is matched to the wrong pocket.
| Outline source | Best for | Watch out for |
|---|---|---|
| Overhead photo with scale reference | Hand tools, meters, everyday gear | Tilted camera angles and dark shadows |
| Paper tracing | Flat tools and simple shapes | Pencil drift around handles and tips |
| CAD or DXF file | Products, prototypes, machined parts | Exporting the wrong face of the part |
| Physical sample | Odd shapes with no drawing | Planning shipping time into the schedule |
How should you mark up a layout sketch before requesting a quote?
Mark up a foam insert layout sketch by showing where each item should sit, which items belong together and where hands need room to grab. A rough drawing on a printout of the case outline is enough. The layout team turns that sketch into a clean, cut-ready mockup, so neatness matters far less than clear intent.
Start with workflow. Put the items used first or most often toward the front edge of the case or drawer, and keep sets such as sockets, bits or lenses in a single row so a gap is obvious. Heavy items usually belong near the hinge side of a hard case so the lid closes evenly and the weight stays balanced when carried.
Useful notes to add to a sketch for a custom foam insert:
- Arrows showing which way each tool faces, especially handles and triggers.
- Circles where you want finger pulls for lifting items out.
- Any item that must sit in a top tray or in the lid foam.
- Spots where you want a spare empty pocket for future tools.
- Label text written right beside the pocket it belongs to.
If your case has a lid, sketch the lid as well. Lid foam can hold flat items such as manuals, gauges and charts, and the hard case foam insert page shows how lid and base layouts work together.
How do logos, labels and foam colors fit into a foam insert layout file?
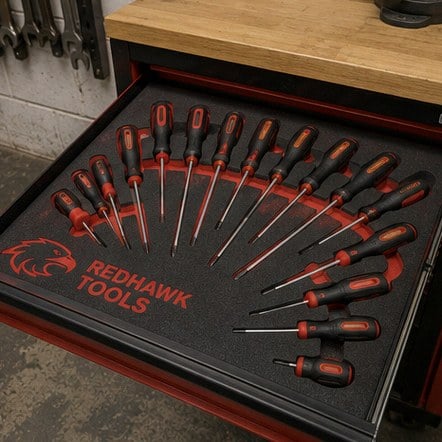
Logos, labels and foam colors are part of the foam insert artwork, so include them in the same package as your tool outlines. Customized Foam Inserts can etch a company logo, tool names, part numbers or kit IDs into the foam surface, and a two-tone build places a contrasting color under the top layer so every empty pocket stands out.
For logos, a vector file such as AI, EPS, SVG or a vector PDF gives the cleanest etched edge. A high-resolution PNG can work for simple marks. Fine detail and thin lines read less clearly in foam than on paper, so a bold version of your logo usually etches best. The engraved custom foam inserts page covers etched logos and labels in more detail.
Label text should be short and consistent. Use the names your technicians already say out loud, keep abbreviations the same across every case, and decide whether part numbers or plain names help your team more. If several cases share a layout but belong to different crews, the label can carry a kit ID while the tool pockets stay identical.
For color, pick the top layer for how the case looks and the base layer for contrast. A dark top over a bright base is the classic tool control combination, while single-color foam suits presentation and packaging work.
What artwork mistakes slow down a custom foam insert order?
The artwork mistakes that slow down a custom foam insert order are missing items, distorted photos and unclear case details. Each one forces an extra revision round. None of them is hard to avoid, and a few minutes of checking before you send files usually saves a day or more of back-and-forth after the mockup arrives.
- An incomplete item list. A charger, a spare battery or a small hex key left off the list means the layout has to be rebalanced once you notice it.
- Photos without scale. Without a ruler or paper reference, every pocket has to be estimated, and estimates drift.
- Tools photographed in holsters or boots. If a tool lives in a rubber boot or sleeve, photograph it that way; if not, remove the accessory first.
- An unnamed case model. Cases that look alike can have different corner radii and depths, so name the exact brand and model.
- Low-resolution logos. A tiny web image etches with soft, broken edges.
Customized Foam Inserts offers unlimited free revisions on the mockup, so nothing is wasted if something is missed. Getting the inputs right the first time simply moves your order into production sooner, with standard turnaround of about 2 weeks after approval.
How does mockup approval work once your files are in?
Once your files are in, Customized Foam Inserts builds a layout and sends a free mockup within 24 hours. The mockup shows every pocket, finger pull, label and color choice on the outline of your case or drawer. You review it, request changes as many times as you need, and pay nothing until you approve the design.
Review the mockup with the person who actually uses the tools, not only the person placing the order. That user will spot a wrench facing the wrong way, a pocket that blocks a latch or a set arranged in an unfamiliar order. Check each item on the mockup against your original list, then confirm label spelling and logo placement.
After approval, the insert moves to cutting. Orders start at a minimum of 12 foam inserts, which suits a fleet of matching cases, a run of product packaging or a set of drawers across several chests. Your approved layout stays on file, so later reorders match the first batch without repeating the artwork work. The how it works page walks through each step from files to delivery, and the tool drawer foam organizer page shows finished drawer builds.
Frequently asked questions
Can I trace my tools on paper instead of taking photos for a foam insert?
Yes, paper tracings work well for custom foam inserts when tools are flat and simple. Hold the pencil straight up and down so the line follows the true edge rather than drifting outward, and write the tool name inside each outline. Scan or photograph the sheet from directly above. Customized Foam Inserts uses the tracing as the outline source and checks it against the case before building the mockup.
What background color should I use when photographing tools for foam pockets?
For foam insert pocket tracing, choose a background that contrasts strongly with the tool. Dark tools such as black wrenches and meters read best on white paper, while chrome or bright tools read best on a dark sheet or mat. A clean edge between tool and background lets the layout team draw an accurate outline quickly, with fewer revision rounds before the mockup is approved.
Do I need to send a photo of the inside of my case for a foam insert?
A photo of the empty case helps a foam insert layout, though the brand and model name matter most. The photo shows hinges, latches, molded ribs and any lid features that affect where pockets can go. Customized Foam Inserts uses the model to size the outer shape and depth, and the photo to avoid placing a tool where a hinge or rib would press into it.
How should I show a tool that has a raised handle or trigger in my foam insert files?
For a foam insert, send an overhead photo plus a side photo of any tool with a raised handle, trigger, dial or battery pack. The side view shows where the tool is thickest, so the pocket can be cut with a deeper step in the right place. Without it, a pocket may hold the body snugly but leave the raised part pressing against the lid foam.
Can one set of foam insert files cover several identical cases?
Yes, one set of foam insert files can cover every identical case in an order. Customized Foam Inserts builds a single layout, you approve the mockup once, and every insert in the run is cut from that approved design. If different crews need their own kit IDs or names etched in, the pockets can stay identical while only the label text changes from case to case.
What file format works best for product outlines in packaging foam inserts?
For packaging foam inserts, a DXF or other CAD export of the product outline is the most accurate format. Export the face of the product as it will rest in the box, not the machining view, and include accessories such as cables or adapters as separate outlines. Customized Foam Inserts can mix CAD outlines with photos for items that have no drawing.
Should I include future tools when I send files for a foam insert?
Include future tools in your foam insert files if you already know their shape, or mark a spare pocket on your sketch if you do not. A reserved pocket keeps the layout balanced and avoids a full redesign later. Customized Foam Inserts can show the spare space on the mockup so you can see how it fits beside the tools you carry today.
How do I send foam insert files when a tool has no drawing and is hard to photograph?
When a tool is irregular and hard to photograph, a physical sample is the most reliable outline source for a foam insert. Customized Foam Inserts can discuss sending the item so the shape is captured directly. Plan the shipping time into your schedule, and send everything else as photos or files in the meantime so the rest of the layout can move forward.
Can I reuse my approved foam insert layout for a different case model?
An approved foam insert layout can often be adapted to a different case model, but the pockets usually need rearranging because the outer shape and depth change. Customized Foam Inserts starts from your saved tool outlines, fits them to the new case and sends a fresh mockup. Reusing outlines saves time because the tools themselves do not need to be photographed again.
Who on my team should review the foam insert mockup before approval?
The person who uses the tools every day should review the foam insert mockup alongside the person ordering. Daily users notice when a tool faces the wrong way, when a set is out of order or when a pocket blocks a latch. Customized Foam Inserts offers unlimited free revisions, so gathering feedback from users before approval costs nothing extra.
How do I label which file belongs to which pocket in a foam insert order?
Name each foam insert file after the item it shows, using the same names as your item list, such as torque wrench or meter probes. Matching names prevent an outline from being placed in the wrong pocket. A short spreadsheet or numbered list linking each file to its item helps on larger kits with many similar tools, sockets or bits.
Get a free mockup for your foam inserts
Send your logo or idea and the quantity you have in mind. Customized Foam Inserts returns a free mockup within 24 hours, you approve the design before anything is produced, and standard turnaround is about two weeks with faster options available. Get a custom quote.